The Art of Waterstops: Essential Know-How for Designers and Trades
Waterstops are a small but crucial detail in any build, ensuring that water stays where it should. When done right, they prevent costly damage and keep floors dry. But getting them right requires precision and an understanding of best practices. Let’s break it down.
The Key Details
Industry experts have weighed in on the technical aspects of waterstops, especially when it comes to substrate preparation. Here’s what you need to know:
- Falls to Drain Points – Ensure a minimum 1:80 fall towards drains to avoid water pooling.
- Surface Smoothness – No ridges, bumps, or hollows in the substrate. A smooth wood float finish is ideal for most liquid-applied membranes (Class 3).
- Concrete Surface Profile (CSP) – The correct roughness should be CSP 2-5, a standard confirmed by industry pros Sam Parker and Stan Giaouris.
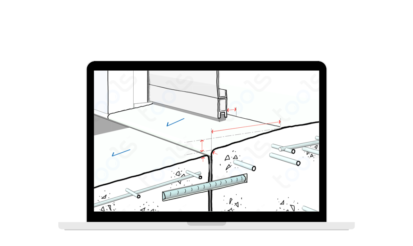
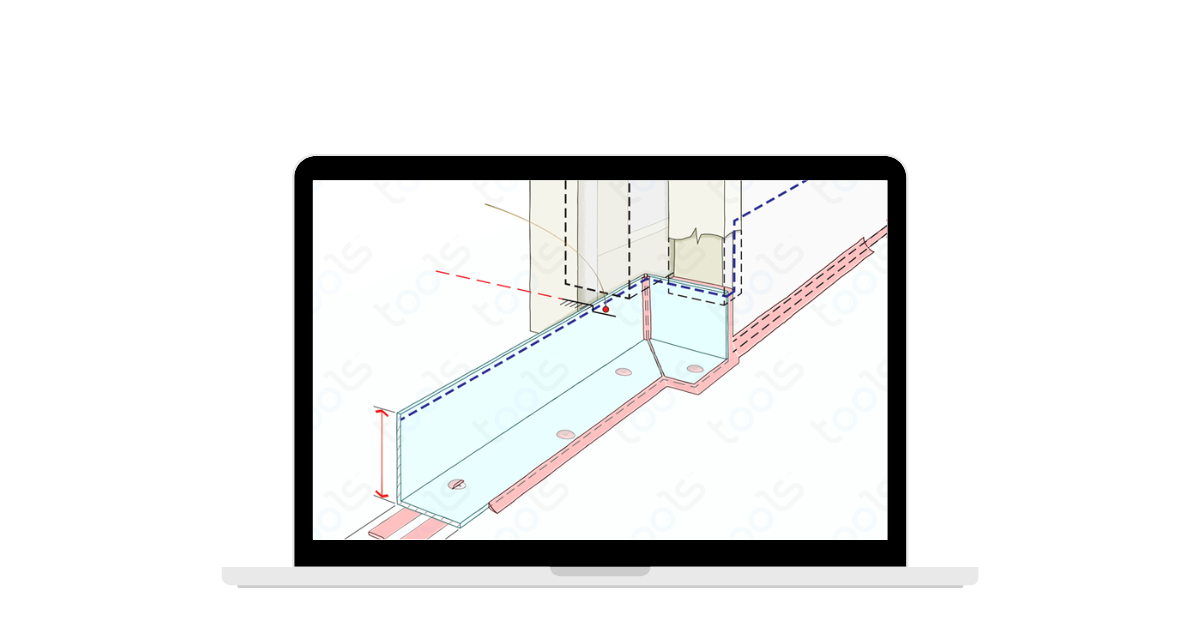
- Waterstop Installation – A 50mm-wide base for the angle with mechanical fixing is essential. The return should go under any pocket doors.
- Sealant & Inspection – Carefully apply sealant at both ends and document the process with photos as part of your Inspection Test Plans (ITPs).
- Alignment Matters – The angle should sit under the centre of the door, ensuring alignment with floor finishes.
- Prevent Water Creeping – A small 3mm lip acts as a barrier, stopping water from migrating onto carpets or floorboards.
Why This Matters
Skipping these details leads to major headaches down the track—water damage, repairs, and compliance issues. By following these best practices, you ensure a watertight, long-lasting solution.
For more insights into construction best practices, visit Building Tools™ Blog.
![]()
![]()